Well, I feel like there aren't enough hours in the day, but then again I think that a lot of us must feel this way. I think that perhaps a little prioritization and list making is in order, but doesn't that take time as well? Anyway, enough of that. I am finishing up the initial April Showers fabric orders to send out, but I wanted to get a quick post in since it has been a little while.
I do really love this new collection by Bonnie and Camille, but then again I love pretty much all of them. While waiting on this new fabric to arrive and procrastinating taxes, I started working on a Mini Dwell using the Thimble Blossoms pattern by none other than Camille Roskelley. I have been on a bit of a Hometown fabric kick lately, so of course that is what I used. I basically love it! Plus, I was able to use some more labels from Sweetwaterscrapbooks on Etsy. Their labels are amazing!
I just need to figure out how I want to quilt it. I want it to be fast, but I want it to look good as well! I take way too long contemplating these things....
The other amazing fabric collection that we just got into the Etsy shop is Grey Abbey by Elizabeth Olwen for Cloud 9. Cloud 9 has a great free quilt pattern using this fabric called the Ribbon Box Quilt on their website. It is definitely worth checking out. I have been greatly anticipating the arrival of this one, and it is perfect! It is up in the shop now, and of course I want to make some thing with it. But I am going to try my hardest to resist, so I can finish a couple of other projects first. Maybe if I can finish a couple I will reward myself by sewing some thing new with it!
Lastly, I was wanting to do a giveaway on Instagram, hopefully sometime tomorrow. If you are interested follow my Instagram account, GoobaDesigns. I think I will be giving away one of Thimble Blossoms "mini" patterns and a fabric kit with it. Haven't decided exactly what yet, any suggestions?
Thanks for stopping by and this post is linked up with WIP Wednesday at Freshly Pieced.
Wednesday, March 5, 2014
Wednesday, February 26, 2014
Work....What Work?
The last few days might have been the most unproductive days, as far as sewing is concerned, in a long while. And unfortunately, I think this is only the beginning, since the kid's sports are starting up again. I guess the good thing about harsh winter weather is that you get to stay inside and sew....or break up fights between the kids! Anyway, I don't have much to show that I haven't already talked about before, except for the mini Dwell that I started using scraps from my farmer's wife blocks. I really like the Dwell pattern if you haven't already noticed from my Christmas and Valentine's versions. Still debating on whether or not to make a Saint Patrick's Day version. Anyway, Camille Roskelley somewhat recently released a mini version of the pattern. I was trying to resist purchasing it since I don't really need to start anything new, but she has a 30% off coupon code this week for her pattern shop because of the Moda Spell It With Fabric Blog Hop. So I caved.
I haven't gotten far AT ALL! I just have three of the nine houses pieced, but it is tiny, so it shouldn't take long to finish. And perhaps it will make me feel better about things not being so productive. As I mentioned before, I am using my Hometown scraps (with a tiny bit of Reunion here and there) because I just can't get enough of it right now and I just purchased some Hometown labels from Sweetwater's Etsy shop that I as thinking of incorporating into the mini Dwell quilt somehow. Perhaps as doors and windows...we will have to see!
This post is linked up with WIP Wednesday at Freshly Pieced.
I haven't gotten far AT ALL! I just have three of the nine houses pieced, but it is tiny, so it shouldn't take long to finish. And perhaps it will make me feel better about things not being so productive. As I mentioned before, I am using my Hometown scraps (with a tiny bit of Reunion here and there) because I just can't get enough of it right now and I just purchased some Hometown labels from Sweetwater's Etsy shop that I as thinking of incorporating into the mini Dwell quilt somehow. Perhaps as doors and windows...we will have to see!
This post is linked up with WIP Wednesday at Freshly Pieced.
Friday, February 21, 2014
An Oliver + S Roller Skate Tunic Made With Palos Verdes Voile from Cloud 9
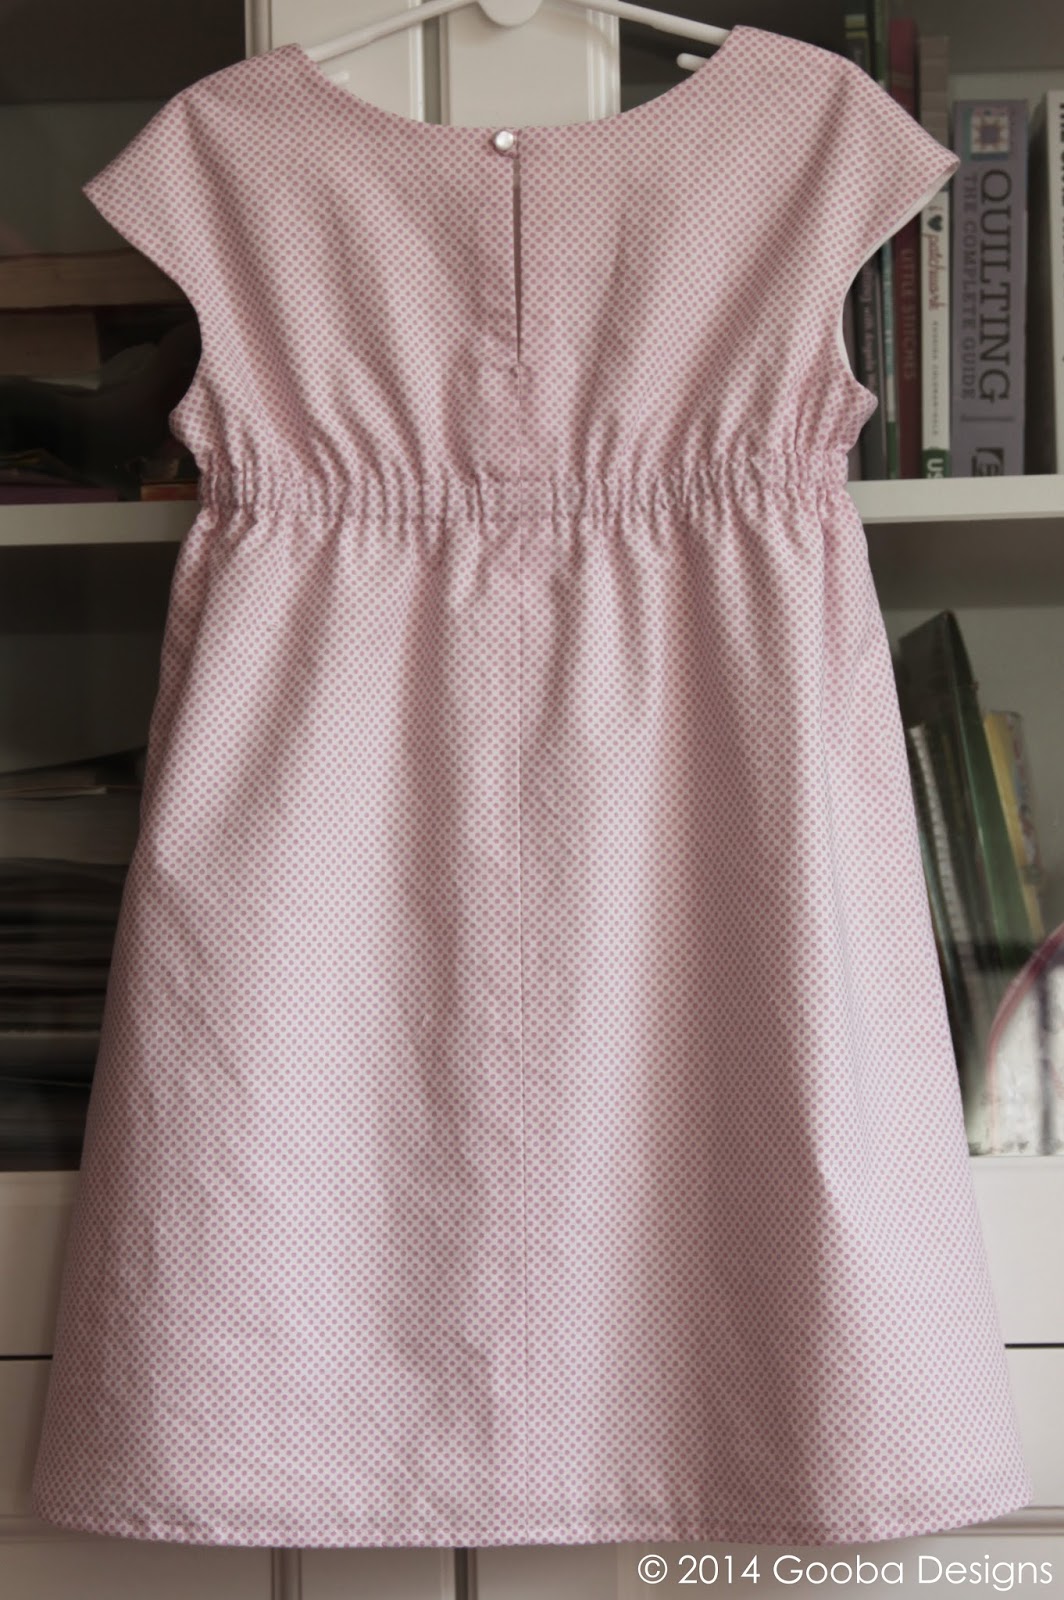
The only thing I was able to finish by today was the Goob's Roller Skate Tunic. It turned out beautifully of course, as all Oliver + S patterns do. This pattern only have two pieces and I love the constructions. Plus it is fairly quick to put together. I made the very basic version and even left the bow off of the front. I made a 4T and then added an inch to the length, and it is perfect. The Goob should be able to wear it for quite a while.
I used the Malaga Cove print from the Palos Verdes voile collection by Cloud 9 Fabrics. The Goob picked the print and I love how it turned out. I think I should have payed a bit more attention to lining up the print at the seams but it isn't super noticeable. She loves it though, so it's a score!
Thanks so much for stopping by. This post is linked up with Finish It Up Friday at Crazy Mom Quilts.
I used the Malaga Cove print from the Palos Verdes voile collection by Cloud 9 Fabrics. The Goob picked the print and I love how it turned out. I think I should have payed a bit more attention to lining up the print at the seams but it isn't super noticeable. She loves it though, so it's a score!
Thanks so much for stopping by. This post is linked up with Finish It Up Friday at Crazy Mom Quilts.
Wednesday, February 19, 2014
Palos Verdes Voile by A Creative Mint from Cloud 9 Fabrics: A WIP Wednesday Edition
The shop recently received some Palos Verdes voile from Cloud 9 and I am in love! I just couldn't wait to make something with it, especially since I had been drooping over it months ago when I first saw a glimpse of it. It has such beautiful colors and the fabric is so soft.
I decided to make a top for myself and then a top for the Goob. For myself I am working on another Datura Blouse by Deer and Doe, but this time I am going to make the version with the Peter Pan-like collar. I am pretty excited about this one. My first Datura, had the triangle cutouts. My favorite print from the Palos Verdes collection is the Abalone Cove, so I went with that one for my new Datura.
Then for the Goob's top I wanted to make the tunic version of the Oliver and S Roller Skate dress since I loved the construction of it so much when I made the Hello Petal version a couple of weeks ago. I let her pick with of the four prints she wanted and she went with the Malaga Cove....she does LOVE pink!
I have also been trying to finish up a quilt I have literally been working on for around seven years! Is that crazy? I have nothing to compare it to really, but that is the longest for me. It was the third quilt I started way back when Neptune by Tula Pink Honey Buns were on sale for around $18 on Ebay! It will be such a relief and joy to finally get this one finished. I just need to sew on the binding...you would think I would hop to it since I am so close, but perhaps I am subconsciously elongating it! Who know?!?!
Thanks so much for stopping by and this post is linked up with WIP Wednesday at Freshly Pieced.
I decided to make a top for myself and then a top for the Goob. For myself I am working on another Datura Blouse by Deer and Doe, but this time I am going to make the version with the Peter Pan-like collar. I am pretty excited about this one. My first Datura, had the triangle cutouts. My favorite print from the Palos Verdes collection is the Abalone Cove, so I went with that one for my new Datura.
Then for the Goob's top I wanted to make the tunic version of the Oliver and S Roller Skate dress since I loved the construction of it so much when I made the Hello Petal version a couple of weeks ago. I let her pick with of the four prints she wanted and she went with the Malaga Cove....she does LOVE pink!
I have also been trying to finish up a quilt I have literally been working on for around seven years! Is that crazy? I have nothing to compare it to really, but that is the longest for me. It was the third quilt I started way back when Neptune by Tula Pink Honey Buns were on sale for around $18 on Ebay! It will be such a relief and joy to finally get this one finished. I just need to sew on the binding...you would think I would hop to it since I am so close, but perhaps I am subconsciously elongating it! Who know?!?!
Thanks so much for stopping by and this post is linked up with WIP Wednesday at Freshly Pieced.
Friday, February 14, 2014
Valentine's Day Dwell and Moda Candy: A Finish It Up Friday Edition
Happy Valentine's Day everyone! It's funny because I do love the idea of Valentine's Day, the colors, and lets not forget the chocolate. I mentioned on Wednesday that I was working on it and showed it to you, so I apologize for the repetition. I did finished quilting and binding it though. I went with some meandering lines with hearts on the background and then some other various free motion quilting on the houses. The quilting isn't great but that is what I get for being in a hurry. I went pretty minimal on the center house because I did not want to take away from the fabric, plus I might have been a little lazy as well!
I also went scrappy on the binding because I thought it would look cute and I had some strips left over from piecing the houses that I wanted to use up. I like how it turned out and I know I said it before but I am seriously loving my pieced heart on the middle house.
The only other holiday Dwell I have made for our wall is the Christmas version. If you don't remember it, here it is.
Now I just need to make one for the next holiday, I guess that would be St. Patrick's Day. That would be fun because my favorite color is green and I just got this fabulous green print from the Ruby collection by Bonnie and Camille. Ah, the possibilities!
Lastly, I wanted to mention that we are giving away free Moda candy (mini charm pack) with each order $25 or more in our Etsy shop today for Valentine's Day!
You can use the link at top of the right side of this post to take you to the Etsy shop and no coupon code is necessary. Thanks for checking out my post today and I hope you all have a wonderful Valentine's Day today and a wonderful weekend.
This post is linked up with Finish It Up Friday at Crazy Mom Quilts and Show Off Saturday at Sew Can She.
Wednesday, February 12, 2014
Valentine's Day Wall Hanging: A WIP Wednesday Edition
For Christmas I made a wall hanging using the Dwell pattern from Camille Roskelley's book, Simply Retro. The plan was to then make one for every holiday/time of the year, so that there would always be one on the wall. That said, I hadn't made any progress with them until now! I made a Valentine themed one, but I still have to quilt it.
Considering Friday is Valentine's Day, I really probably should have made this sooner, but hey at least it is almost finished!
I did modify one of the blocks a little and added a heart instead of the pinwheel. I love it! Plus, the red Mochi dot and the ruby floral definitely help.
This post is linked up with WIP Wednesday at Freshly Pieced.
Considering Friday is Valentine's Day, I really probably should have made this sooner, but hey at least it is almost finished!
I did modify one of the blocks a little and added a heart instead of the pinwheel. I love it! Plus, the red Mochi dot and the ruby floral definitely help.
This post is linked up with WIP Wednesday at Freshly Pieced.
Friday, February 7, 2014
Oliver + S Roller Skate Dress Using Hello Petal: A Finish It Up Friday Edition
For Kid's Clothing Week last week I managed to finish two dresses. The first was the Fairy Tale Dress and the other was this Roller Skate Dress.
For the dress, I used the basic pink dot print from Aneela Hoey's new Hello Petal line. I love this new line! I especially love the dark navy prints. Since the Goob is a REALLY big fan of pink, we went for the pink dot print for the dress and then I added one of the navy floral prints as the bow accents. I did make the 4T for my new three year old. It is a bit large on her, but I like to do that so that she can wear it much longer.
As for the pattern, it was great as usual, as Oliver and S patterns usually are. I particularly liked the construction of this dress and the shape is so cute. The directions were easy to follow and there were good diagrams for most of the steps. The dress is lined which is also great so a sheer voile would work wonderfully with this pattern. I am super excited to try some of the the new Palos Verdes voile from Cloud 9, which should be up in the shop sometime next week....yay! I do love this dress so much and you can make a tunic version as well and I so want to make 10 more....but I must stay on track.
Thanks so much for stopping by and I hope you come back again soon!
This post is linked up with Finish It Up Friday at Crazy Mom Quilts and Show Off Saturday at Sew Can She.
For the dress, I used the basic pink dot print from Aneela Hoey's new Hello Petal line. I love this new line! I especially love the dark navy prints. Since the Goob is a REALLY big fan of pink, we went for the pink dot print for the dress and then I added one of the navy floral prints as the bow accents. I did make the 4T for my new three year old. It is a bit large on her, but I like to do that so that she can wear it much longer.
As for the pattern, it was great as usual, as Oliver and S patterns usually are. I particularly liked the construction of this dress and the shape is so cute. The directions were easy to follow and there were good diagrams for most of the steps. The dress is lined which is also great so a sheer voile would work wonderfully with this pattern. I am super excited to try some of the the new Palos Verdes voile from Cloud 9, which should be up in the shop sometime next week....yay! I do love this dress so much and you can make a tunic version as well and I so want to make 10 more....but I must stay on track.
Thanks so much for stopping by and I hope you come back again soon!
This post is linked up with Finish It Up Friday at Crazy Mom Quilts and Show Off Saturday at Sew Can She.
Wednesday, February 5, 2014
The Beginning of My Farmer's Wife Quilt...'Bout Time!
I need another project like a hole in the head, however I have been planning this one ever since I saw Camille Roskelley's version over a year ago. I originally wanted to make one using similar colors and fabric as Camille, but then I recently got my hands on some more Hometown fabric by Sweetwater and decided that it would be perfect!
So, I want to make a king size version of the farmer's wife quilt which means that I would need 145 blocks, with 34 repeated. Since I have so many other projects that I need to finish, I decided I would make 12 block a month so that I should have all that I need by the end of the year. They are pretty addictive though, which means I have already made 21 so I am doing pretty well so far at staying on track. These blocks are great because they are small, 6" x 6," and I can cut the pieces while sitting at my three year old's table in the living room with her while she colors/plays. I have been cutting a few at a time, laying them out on a piece of printer paper and then stacking them. That way, I can take my stack up and sew them later. Not really sure why this makes me so happy, but it does!
That was the first set of 12 for January, and below is the first nine of my February bunch.
I was going to include individual pictures of each of the blocks with the corresponding pages in the book, but then realized that would most likely be overkill. So, I will just include a few below.
I just want to apologize for my photos. I didn't get any taken when it was light out and my camera is very sick, so they are really bad. Anyway, thanks for checking them out and I am hoping to stay on track and post at least once a month on the progress.
This post is linked up with WIP Wednesday at Freshly Pieced.
So, I want to make a king size version of the farmer's wife quilt which means that I would need 145 blocks, with 34 repeated. Since I have so many other projects that I need to finish, I decided I would make 12 block a month so that I should have all that I need by the end of the year. They are pretty addictive though, which means I have already made 21 so I am doing pretty well so far at staying on track. These blocks are great because they are small, 6" x 6," and I can cut the pieces while sitting at my three year old's table in the living room with her while she colors/plays. I have been cutting a few at a time, laying them out on a piece of printer paper and then stacking them. That way, I can take my stack up and sew them later. Not really sure why this makes me so happy, but it does!
That was the first set of 12 for January, and below is the first nine of my February bunch.
I was going to include individual pictures of each of the blocks with the corresponding pages in the book, but then realized that would most likely be overkill. So, I will just include a few below.
I just want to apologize for my photos. I didn't get any taken when it was light out and my camera is very sick, so they are really bad. Anyway, thanks for checking them out and I am hoping to stay on track and post at least once a month on the progress.
This post is linked up with WIP Wednesday at Freshly Pieced.
Friday, January 31, 2014
A Fairy Tale Dress: A Finish It Up Friday Edition for Kid's Clothing Week
As usual I was hoping to get a lot more done. I think my problem is that I am just not approaching things realistically! Anyway, I finally finished up the Goob's Fairy Tale dress by Oliver and S. I seriously started this dress about a year ago...thank goodness I always cut out a larger size. I suppose subconsciously I really know how things will turn out. I am just super happy that she really likes the dress. She is calling it her fairy princess dress. It is the worst when I finish something up and she doesn't want anything to do with what I made. It has only happened maybe twice and it was because I caught her at a not-so-good time, but it was enough to know to wait until she is good and ready to try something on her! Today was not a problem though...
She actually kept asking me when it would be finished! Too cute. Well, between my camera issues (keep getting a shutter error when shooting) and the fact we only had five minutes before we needed to leave for ballet, I did not get many good shots. Plus, I would like to take some detail shots of construction and perhaps talk a little bit more about how it goes together....however, that is for another day! The photo below shows a little about how you finish the arm holes for the sleeveless version of the dress.
And my favorite part, the vintage glass buttons!
To quickly wrap is up for now, this is another great pattern from Oliver and S. It is not really difficult, but is a bit time consuming as it has many steps and is fully lined. That said, I did add a few details that were not part of the pattern, such as the piping/cording on the collar and the addition of the buttons which added a bit to the time. The time commitment is well worth it though, especially if your little one loves it as much as mine does!
Now I am off to finish up one more dress for Kid's Clothing Week....an Oliver and S Roller Skate Dress. Been waiting a while for this one, oh and can you tell we are Oliver and S fans around here?
This post is linked up with Finish It Up Friday at Crazy Mom Quilts.
She actually kept asking me when it would be finished! Too cute. Well, between my camera issues (keep getting a shutter error when shooting) and the fact we only had five minutes before we needed to leave for ballet, I did not get many good shots. Plus, I would like to take some detail shots of construction and perhaps talk a little bit more about how it goes together....however, that is for another day! The photo below shows a little about how you finish the arm holes for the sleeveless version of the dress.
And my favorite part, the vintage glass buttons!
To quickly wrap is up for now, this is another great pattern from Oliver and S. It is not really difficult, but is a bit time consuming as it has many steps and is fully lined. That said, I did add a few details that were not part of the pattern, such as the piping/cording on the collar and the addition of the buttons which added a bit to the time. The time commitment is well worth it though, especially if your little one loves it as much as mine does!
Now I am off to finish up one more dress for Kid's Clothing Week....an Oliver and S Roller Skate Dress. Been waiting a while for this one, oh and can you tell we are Oliver and S fans around here?
This post is linked up with Finish It Up Friday at Crazy Mom Quilts.
Wednesday, January 29, 2014
Fresh Block From Simply Retro Book by Camille Roskelley: A WIP Wednesday Edition
Hi there! Well, I am all over the place. I seriously need to get some focus. I have seen a couple of people now have nice spreadsheets of projects and their status. I am going to need to get working on that.
On to the main reason for this post, last year I participated in a quilt along for Camille Roskelley's book, Simply Retro which was hosted by Jana Machado. I wasn't able to make the first couple of projects but jumped in with the Baby Love large quilt, and made all of the projects from there except the last one because the quilt along took a bit of a hiatus. Well, it started up again at the beginning of the year and I had already planned out the Fresh project last year, so I thought I would at least make a block so that I could be considered for the drawing. The project calls for layer cake squares, but I am using a La Belle Fleur by French General dessert roll which are 5" by WOF strips. I am adding the Essex Linen in the HST around the stars, so I should have plenty to finish the 96" x 96" quilt.
This week is also kids clothing week, so I picked up on a couple of my unfinished projects for the Goob, and maybe start one new one! Aneela Hoey's new line Hello Petal just came out and she is having a contest where you can enter any project using her new fabric. So, I HAD to start a new dress using her gorgeous new fabric line. SO, you should make something and enter as well!
I better get back to sewing so I can get all of this finished! Thanks so stopping by and come back soon to see if I actually get it done....
This post is linked up with WIP Wednesday at Freshly Pieced and the Simply Retro Quilt Along with Jana Machado.
On to the main reason for this post, last year I participated in a quilt along for Camille Roskelley's book, Simply Retro which was hosted by Jana Machado. I wasn't able to make the first couple of projects but jumped in with the Baby Love large quilt, and made all of the projects from there except the last one because the quilt along took a bit of a hiatus. Well, it started up again at the beginning of the year and I had already planned out the Fresh project last year, so I thought I would at least make a block so that I could be considered for the drawing. The project calls for layer cake squares, but I am using a La Belle Fleur by French General dessert roll which are 5" by WOF strips. I am adding the Essex Linen in the HST around the stars, so I should have plenty to finish the 96" x 96" quilt.
This week is also kids clothing week, so I picked up on a couple of my unfinished projects for the Goob, and maybe start one new one! Aneela Hoey's new line Hello Petal just came out and she is having a contest where you can enter any project using her new fabric. So, I HAD to start a new dress using her gorgeous new fabric line. SO, you should make something and enter as well!
I better get back to sewing so I can get all of this finished! Thanks so stopping by and come back soon to see if I actually get it done....
This post is linked up with WIP Wednesday at Freshly Pieced and the Simply Retro Quilt Along with Jana Machado.
Friday, January 24, 2014
I Heart My Washi: A Washi Pattern Review
So, I am sure that you have seen a number of different versions of the Washi Dress at this point, I know I am a bit late to the game, but I figured I would write a little bit about my experience with it.
First off, I have been wanting to try this pattern forever! I finally bought it a few months ago and then made it right after Christmas. It did not take much time and I really liked the construction of the dress. I did not make any modifications to the size small, I just cut and sewed it as is. The one modification I did make was that I did not do facing as the pattern called for, I used Rae's tutorial for lining the bodice. I just don't like how you can see the outline of facing under certain fabric. I am glad I did do the lining instead of the facing and I really do not think it was any more work than the facing.
When I am looking at pattern reviews or pictures of other peoples versions, I really like to see when someone is actually wearing the piece of clothing. I feel it helps me to get a better idea of what it will look like on me. So, I will include some photos of me in the dress but go easy on me. Plus, my photographer did not want to get off of the couch, so the camera angle in not ideal. Perhaps I will add some new photos when it is not freezing outside to get some better shots!
The Rundown
Overall: I would highly recommend the pattern, from beginners to advance sewers. I think the construction is nice, and it goes together easily. The dress or top can be dressed up or down and is a forgiving and comfortable fit. You can also make a number of modification to the pattern with the many tutorials that Rae has on her site as well as the Washi Expansion Pack that she recently released.
Available Formats: PDF and Paper
A Second Washi: Yes, I will definitely be making another. Most likely a tunic version first.
What I Would Modify On The Second Round: I will most likely mess with the darts a bit again. On this particular version, I was pretty impatient and just wanted to get it done....mostly because I was supposed to be doing something else! Anyway, after looking at the photos I realized I need to make the darts shorter, meaning they need to end more on the side of my boob instead of toward the top (makes it a little pointy).
What I Was Glad I Did: Lining the bodice using a very light weight, 100% cotton muslin instead of using facing.
What My Favorite Aspect Was: The smocking on the back. Not sure why, but I love it! Oh, and I also love the cap sleeves and of course, the pockets.
Fabric I Used: Rose Garden in Coral from the Fort Firefly Collection by Teagan White for Birch Fabric, 100% organic cotton, quilting weight woven fabric
Check out other peoples versions at the Washi Dress Flickr Pool and Rae Made Me Do It Flickr Pool
And if I left anything out, messed anything up, or if you have any suggestions please let me know! Thanks so much for checking it out.
This post has been linked up with Finish It Up Friday at Crazy Mom Quilts and Show Off Saturday at Sew Can She.
First off, I have been wanting to try this pattern forever! I finally bought it a few months ago and then made it right after Christmas. It did not take much time and I really liked the construction of the dress. I did not make any modifications to the size small, I just cut and sewed it as is. The one modification I did make was that I did not do facing as the pattern called for, I used Rae's tutorial for lining the bodice. I just don't like how you can see the outline of facing under certain fabric. I am glad I did do the lining instead of the facing and I really do not think it was any more work than the facing.
When I am looking at pattern reviews or pictures of other peoples versions, I really like to see when someone is actually wearing the piece of clothing. I feel it helps me to get a better idea of what it will look like on me. So, I will include some photos of me in the dress but go easy on me. Plus, my photographer did not want to get off of the couch, so the camera angle in not ideal. Perhaps I will add some new photos when it is not freezing outside to get some better shots!
The Rundown
Overall: I would highly recommend the pattern, from beginners to advance sewers. I think the construction is nice, and it goes together easily. The dress or top can be dressed up or down and is a forgiving and comfortable fit. You can also make a number of modification to the pattern with the many tutorials that Rae has on her site as well as the Washi Expansion Pack that she recently released.
Available Formats: PDF and Paper
A Second Washi: Yes, I will definitely be making another. Most likely a tunic version first.
What I Would Modify On The Second Round: I will most likely mess with the darts a bit again. On this particular version, I was pretty impatient and just wanted to get it done....mostly because I was supposed to be doing something else! Anyway, after looking at the photos I realized I need to make the darts shorter, meaning they need to end more on the side of my boob instead of toward the top (makes it a little pointy).
What I Was Glad I Did: Lining the bodice using a very light weight, 100% cotton muslin instead of using facing.
What My Favorite Aspect Was: The smocking on the back. Not sure why, but I love it! Oh, and I also love the cap sleeves and of course, the pockets.
Fabric I Used: Rose Garden in Coral from the Fort Firefly Collection by Teagan White for Birch Fabric, 100% organic cotton, quilting weight woven fabric
Check out other peoples versions at the Washi Dress Flickr Pool and Rae Made Me Do It Flickr Pool
And if I left anything out, messed anything up, or if you have any suggestions please let me know! Thanks so much for checking it out.
This post has been linked up with Finish It Up Friday at Crazy Mom Quilts and Show Off Saturday at Sew Can She.
Thursday, January 23, 2014
It's From The Pile...I Promise: A WIP Wednesday Edition
Okay, yes I am easily distracted, but I promise this one is truly from my giant WIP pile! I have strayed a bit from the path, for example I got lured into the It's A New Year Sewalong at Sew Can She and made a little boxy pouch for the Goob.
Then I found out that the Simple Retro Quilt Along that I participated in last year started back up at the beginning of the month, so I then felt like I needed to finish the last project that I had planned for that. So, I started on that again....in my defense it is the last project in the book and I already had it planned in my head! Does that count as a WIP?
Anyway, on to the main point of my post, my WIP using the scraps from the twin baby boy quilts I made a little while ago. As I was piecing the original quilts I kept the paired up triangle that I cut off together and then chain pieced then and set them in my WIP pile. I think I even showed a photo of them in one of my other WIP posts about the twin boy quilts. Anyway, as I was cleaning and organizing my sewing room...or attempting to at least...I came across my print outs from Camille Roskelley's first Craftsy class, Pre-Cut Piecing Made Simple. In there she gives some examples of varying ways to put together half square triangles and one idea was a sampler. What a great idea, so I mixed it up ever so slightly and BAM, I almost had enough to make a nine block sampler with 14" blocks. I just had to make 10 extra half square triangles which isn't bad, especially since I had some additional left overs of several of the prints. I even threw in a new one, can you tell which one it is?
The photo above is actually the layout upside down because I couldn't take it any other way and when I flipped it in Photoshop it did not look right, just a little FYI. All about the acronyms tonight. Well, I am super excited about this one for some reason. I guess because I was able to use all of those half square triangles for something I really like...yay! Although, it didn't make the pile much smaller...
This post is linked up with WIP Wednesday at Freshly Pieced.
Then I found out that the Simple Retro Quilt Along that I participated in last year started back up at the beginning of the month, so I then felt like I needed to finish the last project that I had planned for that. So, I started on that again....in my defense it is the last project in the book and I already had it planned in my head! Does that count as a WIP?
Anyway, on to the main point of my post, my WIP using the scraps from the twin baby boy quilts I made a little while ago. As I was piecing the original quilts I kept the paired up triangle that I cut off together and then chain pieced then and set them in my WIP pile. I think I even showed a photo of them in one of my other WIP posts about the twin boy quilts. Anyway, as I was cleaning and organizing my sewing room...or attempting to at least...I came across my print outs from Camille Roskelley's first Craftsy class, Pre-Cut Piecing Made Simple. In there she gives some examples of varying ways to put together half square triangles and one idea was a sampler. What a great idea, so I mixed it up ever so slightly and BAM, I almost had enough to make a nine block sampler with 14" blocks. I just had to make 10 extra half square triangles which isn't bad, especially since I had some additional left overs of several of the prints. I even threw in a new one, can you tell which one it is?
The photo above is actually the layout upside down because I couldn't take it any other way and when I flipped it in Photoshop it did not look right, just a little FYI. All about the acronyms tonight. Well, I am super excited about this one for some reason. I guess because I was able to use all of those half square triangles for something I really like...yay! Although, it didn't make the pile much smaller...
This post is linked up with WIP Wednesday at Freshly Pieced.
Friday, January 17, 2014
Finish It Up Friday: Twin Baby Boy Quilts
I wanted to finally give an update on those twin baby boy quilts. I did end up getting them done by the deadline and I finished another right after them that I honestly thought I had more time on, the book quilt. All quilts were delivered and I think everyone was satisfied....at least I hope they truly were. Anyway, I will list a few photos below. It is a really simple pattern I know, but what are your thoughts?
I tried to make them unique but similar...that sounds weird, but you know what I mean, right?!?! They both have some of the same fabric, but then one has more lighter prints and the other is a bit darker.
Just a couple more...
Then here is the "darker" version without the "lighter" one in the way.
Then lastly I love the way quilts look when they are folded and stacked....wanted to do this one for a while! I am hoping to get a much better shot in the future.
This post is linked up with Finish It Up Friday at Crazy Mom Quilts and Show Off Saturday at Sew Can She.
I tried to make them unique but similar...that sounds weird, but you know what I mean, right?!?! They both have some of the same fabric, but then one has more lighter prints and the other is a bit darker.
Just a couple more...
Then here is the "darker" version without the "lighter" one in the way.
Then lastly I love the way quilts look when they are folded and stacked....wanted to do this one for a while! I am hoping to get a much better shot in the future.
This post is linked up with Finish It Up Friday at Crazy Mom Quilts and Show Off Saturday at Sew Can She.
Subscribe to:
Posts (Atom)